Your Body Measurement Guide for Online Shopping
You spot a jacket online, add it to cart, and already know the mood you want. Clean, sharp, maybe a little dramatic. Then it arrives, and the actual problem isn't just sizing. It's that the whole look feels different on you than it did in your head.
That's why a good body measurement guide is more important than commonly believed. Not because measuring is glamorous, but because it gives you a clearer starting point for visualizing shape, proportions, and styling choices before you buy.
Your Guide to Smarter Online Shopping
You open a product page for a satin slip dress and can already see the outfit in your head. Maybe it feels sleek and minimal. Maybe it needs a chunky knit and boots. The frustrating part is not choosing a size. It is figuring out whether the shape on the screen will create the same effect on you.
That is why measurements are so useful. They give you a clearer picture of proportion, line, and balance before you buy. A waist measurement can hint at how a dress might skim or define. Shoulder width can change how a blazer feels. Inseam can tell you whether trousers will look sharp, relaxed, or slightly off in a way that throws off the whole outfit.
Measurements work like the outline in a sketch. Once you have that outline, it becomes much easier to picture the finished look.
So the goal is bigger than finding a number on a size chart. You are learning how clothes interact with your shape. That shift makes online shopping feel far more creative, because you start reading product photos with your own body in mind instead of borrowing the proportions of a model.
Body measurements help turn online product photos into a more realistic preview of your personal style.
It also helps to pair measurements with clear reference images. If you want better photos for style visualization later, this guide to taking a full-body picture for outfit previews shows how to keep your angle, framing, and posture consistent.
Once you know your proportions, shopping from Zara, H&M, Amazon, Shein, Vinted, or Depop starts to feel less like guesswork and more like styling. You can compare silhouettes, notice where a hem might land, and spot whether a cut is likely to create the mood you want. That is the payoff. Better measurements give you a better visual starting point, and tools like TryThisFit make that picture easier to see.
Preparing for Your Measurement Session
You know that online shopping moment. A dress looks sculpted and elegant on the model, then you wonder whether it would hit you at the waist, float past it, or create a completely different shape. A short measuring session gives you the missing map before you start browsing.
This prep work is not about turning your body into a list of numbers. It is about giving yourself better raw material for style visualization later. Once your setup is consistent, it becomes much easier to compare silhouettes, picture proportions, and get more useful previews from tools like TryThisFit.
What to gather first
A calm setup helps more than fancy equipment. Grab a soft tape measure, a full-length mirror, close-fitting clothes or light layers, and a phone or notebook so you can save each number right away.
If you also want cleaner inputs for outfit previews, this guide to taking a full-body picture for outfit previews shows how to keep your angle, framing, and posture consistent.
A second person can help, but you do not need one. Good lighting, a mirror, and a few unhurried minutes are usually enough.
The small setup details that change the result
Stand the way you normally stand. Relax your shoulders. Let your arms hang naturally. For several key measurements, keeping your feet together helps you stay consistent and makes it easier to spot if the tape has tilted.
The tape should touch your body without squeezing it. If it leaves deep marks, the number is describing pressure instead of shape.
A useful habit is to find the landmark before you wrap the tape. It works like sketching the outline before adding color. Once you know the point you are measuring from, the final number has a lot more meaning.
If you want a practical reference for preparing and measuring clothing-related body points, this essential guide for fashion professionals gives a clear overview.
Make repeatability the goal
One reading matters less than a repeatable method.
The CDC's NHANES anthropometry program uses fixed landmarks and consistent posture so measurements can be compared over time (CDC NHANES anthropometry manual). That same idea works beautifully at home. If you measure in similar clothing, stand the same way, and record numbers immediately, your results become far more useful for shopping.
That is the part people often miss. Reliable measurements do not just help with fit. They help you picture style on your frame with more confidence, which makes browsing feel a lot more creative and a lot less like guesswork.
How to Take Your Core Body Measurements
You found a jacket online that has the exact shape you love. Before you guess a size and hope for the best, grab three numbers that act like a sketch of your frame: bust or chest, waist, and hips.
These measurements do more than help with fit. They help you picture where fabric will follow your shape, where it might skim past it, and which silhouettes you may want to try first. If you plan to use a visual fitting tool later, this is the part that gives the preview real value.
Bust or chest
Measure around the fullest point of the bust or chest. Place the tape first, let your arms relax, then check that the tape stays level across your back and sides.
That order helps. If you raise your arms while wrapping the tape and forget to settle them again, the number can shift.
If you wear bras regularly, measure in the bra you would most likely wear with fitted tops or dresses. For more bra-specific measuring help, TryThisFit also offers a virtual bra fitting guide that focuses on that area in more detail.
Natural waist
The waist trips people up because clothing waistlines vary so much.
Your natural waist is usually the narrower part of your torso, not automatically the spot where your trousers or jeans sit. Wrap the tape around that point and let it rest flat without pulling. Breathe normally. Then take the reading.
A good way to check yourself is to bend gently to one side before measuring. The crease that forms often marks the area you want.
Hips
For hips, measure around the widest part of the hips and seat with your feet together. This is often lower than people expect, which is why hip numbers can look different from the size chart assumptions in your head.
Use a mirror if possible. The tape should stay parallel to the floor all the way around. If it climbs in the back or dips in the front, the number describes the tape angle more than your actual shape.
That small correction matters a lot with skirts, dresses, fitted trousers, and any silhouette that depends on how fabric moves past the lower body.
If you like sewing-style terminology for these landmarks, Display Guru has an essential guide for fashion professionals that shows how apparel measurements are commonly described.
Core measurement cheat sheet
| Measurement | Where to Measure | What it helps you visualize |
|---|---|---|
| Bust or chest | Around the fullest point | How fitted or relaxed tops may look through the upper body |
| Waist | At the natural waist | Where dresses, skirts, and shaped jackets may define your middle |
| Hips | Around the widest point of hips and seat | How skirts, trousers, and longer tops may fall over the lower body |
Easy mistakes that change the result
A few habits can throw these numbers off fast:
- Measuring over bulky clothes adds volume that your garments will not account for
- Tilting the tape changes the reading, especially at the hips and bust
- Sucking in or holding your breath gives you a number that does not match how you wear clothes
- Using a waistband as your waist marker creates inconsistent results from one session to the next
Once you have these three numbers, online shopping gets more visual. You are no longer staring at a size label and guessing. You are starting to see shape, balance, and proportion before you click.
Advanced Measurements for Specific Garments
A dress can look polished on the product page, then feel oddly short-waisted on you. A blazer can have the right chest measurement and still look off because the shoulder line ends in the wrong place. These are usually not size problems. They are proportion clues.
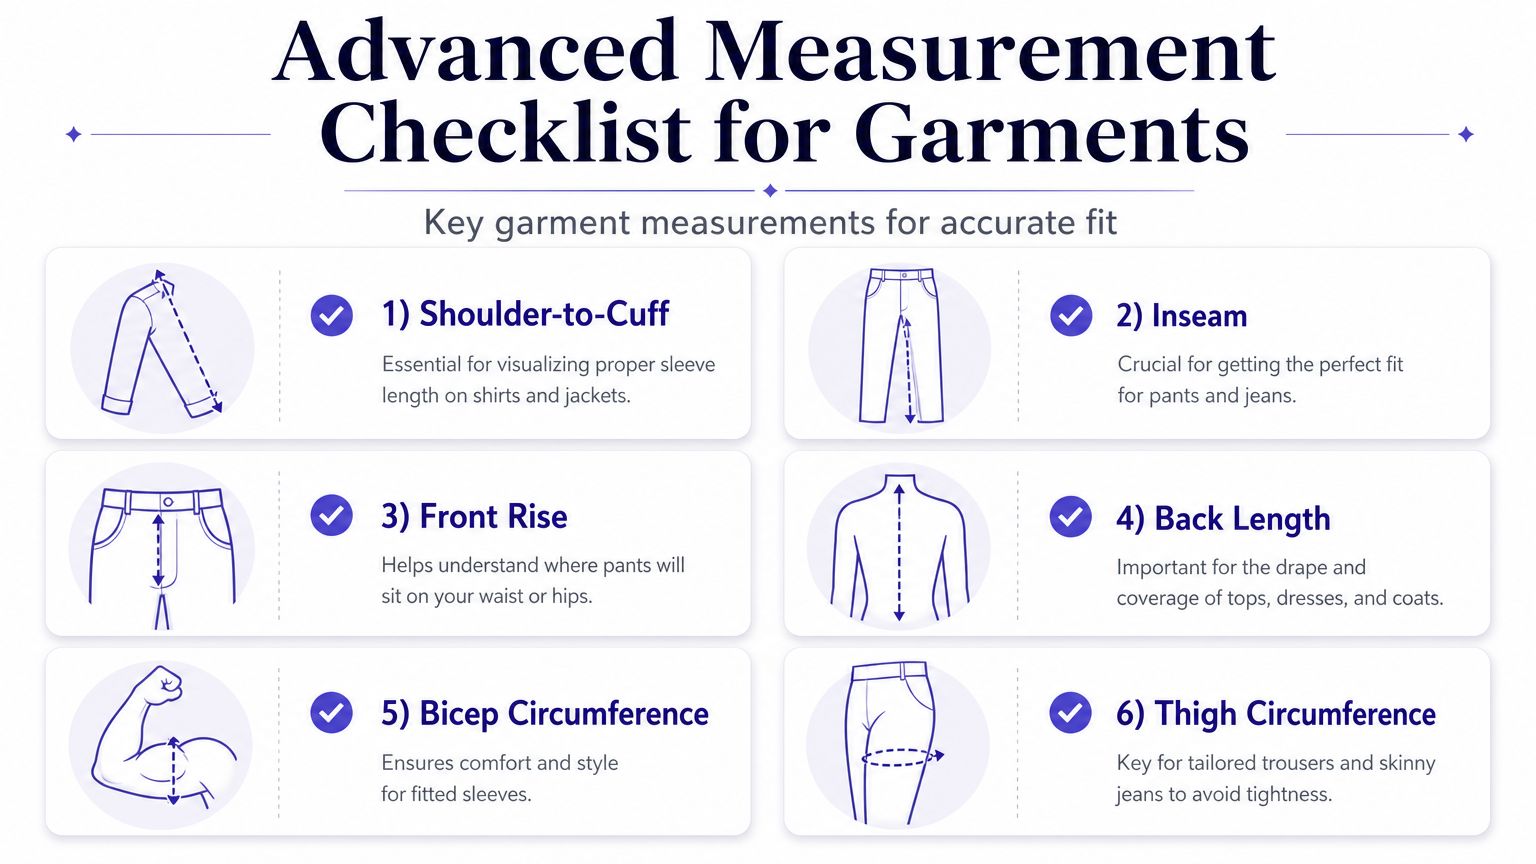
Extra measurements help you see the shape of a garment on your body before it arrives. They work like reference points in a sketch. Once you know where your shoulder ends, where your sleeve usually finishes, or where a hem is likely to hit, shopping gets much more visual and much more fun.
For tops and jackets
Shoulder width changes the whole attitude of a top. If the shoulder seam sits past your actual shoulder point, the piece usually reads softer, looser, and more casual. If it lands right on that point, the look tends to feel cleaner and sharper.
Sleeve length adds another layer. Measure from your shoulder point down to where you want the cuff to end. That single number helps you picture whether a shirt will look intentionally relaxed, well-fitted, or slightly too short.
Back length matters too. It tells you where a shirt, blazer, or coat will visually stop on your frame, which can change the balance of the whole outfit.
For trousers and jeans
With bottoms, the eye usually notices length first.
Inseam helps you predict where the hem will land on your leg. Outseam shows the full outside length, which is useful for high-rise trousers, wide-leg shapes, and jumpsuits. Thigh circumference gives you a clearer picture of how narrow or easy the cut may look through the upper leg, especially in straighter denim or dress trousers.
Sewing references often describe inseam as the inside-leg measurement from the crotch area down to the hem, and thigh as a horizontal measurement taken around the upper leg. Those details matter because a slightly twisted tape can change the result enough to affect how you visualize a slim or relaxed silhouette.
For dresses and longer pieces
Longer garments are all about vertical lines.
Back length becomes especially useful with dresses, tunics, and coats because it helps you predict how much coverage and drama a piece creates. A shorter measurement often pairs well with playful, above-the-knee shapes. A longer one can support a more column-like look, especially in straighter cuts.
For fitted dresses and tops, undergarment shape can change the final look almost as much as the garment itself. If that is part of your styling puzzle, a virtual bra fitting guide for outfit planning can help you compare shape and clothing appearance together.
If you are also tracking physical changes for fitness goals, Strive Workout Log explains methods to track muscle and fat from a training perspective. That is a different goal from style preview, but it can be useful if you keep both kinds of notes.
Extra measurements make your style picture clearer.
A smart shortlist to save
You do not need a huge spreadsheet. For visualizing clothes in TryThisFit or comparing product measurements across stores, these are the ones worth saving in your notes:
- Shoulder-to-cuff for shirts, jackets, and coats
- Back length for tops, dresses, and outerwear
- Inseam for trousers, jeans, and jumpsuits
- Thigh circumference for narrow or straight leg silhouettes
- Neck for shirts, collars, and high-neck styling
These numbers give you more than fit information. They give you a better preview of line, proportion, and overall style direction.
Turn Your Measurements into Style Previews
You find a great coat online. The model looks polished. The size chart looks plausible. The reviews somehow say “runs big” and “runs small” in the same breath. What you really want is a preview. You want to see the shape, the length, and the mood of that coat on you before you spend money on it.
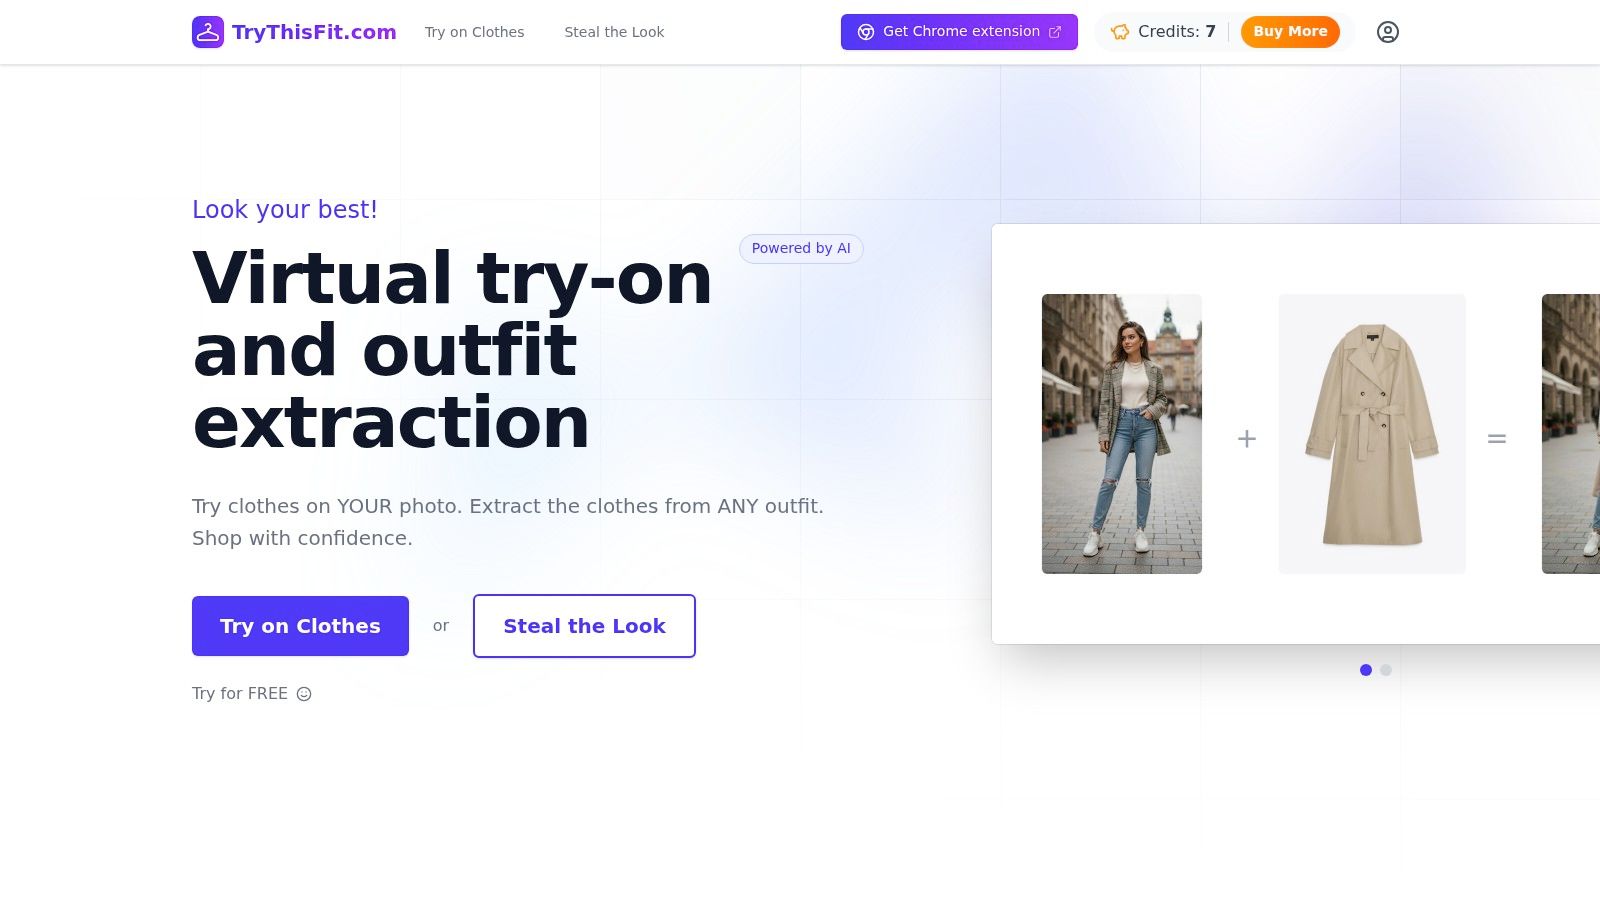
Your measurements help you get there. They are not just numbers for matching a size label. They are reference points for visualizing style. Once you know your proportions, shopping gets more creative. You can start asking better questions, like whether a high neckline will feel refined or severe on you, whether a cropped jacket will sharpen your shape, or whether a long cardigan will read relaxed instead of overwhelming.
I built TryThisFit for that part of the process. It lets you preview clothing on your own photo, compare options quickly, and get a clearer picture of how different pieces may look before you buy.
A faster way to shop across different sites
This becomes especially useful when your style hunt jumps between stores and marketplaces. You might save a blazer from Zara, compare a knit from H&M, check a find on Amazon fashion, then fall into a secondhand spiral on Vinted or Depop.
The Chrome extension keeps that flow easy. It works directly from the page you are already browsing, so you can right click a clothing image and start a try-on without copying links back and forth. For the clearest preview, flat-lay clothing photos work best.
If you want to test it, you can install the free Chrome extension and try it from a product image in a few clicks.
Why measurements matter in a visual tool
A visual preview works better when it starts with a clear sense of your proportions. Measurements give structure to what your eye is noticing. They help you judge where a hem might land, how open or closed a neckline may feel, and whether a silhouette will look crisp, fluid, dramatic, or understated on your frame.
It helps to treat your measurements like the outline sketch before the color goes in. The sketch is not the finished artwork, but it makes the final picture much easier to read.
Careful measuring gives you a better base for evaluating proportions, necklines, sleeve lines, and garment length when you preview style visually.
A simple workflow usually looks like this:
- Take clear personal photos with even lighting and a straight, relaxed pose.
- Choose garment photos that show the item clearly, preferably flat-lay images.
- Preview the item on your image to get a visual sense of shape and proportion.
- Compare several options side by side instead of relying only on charts or model photos.
- Save the looks you like so you can review them later in your try-on history.
This short demo shows what that looks like in practice.
<iframe width="100%" style="aspect-ratio: 16 / 9;" src="https://www.youtube.com/embed/g9ICLvwyGgk" frameborder="0" allow="autoplay; encrypted-media" allowfullscreen></iframe>If you shop often, especially across marketplaces and secondhand listings, this approach cuts down on guesswork. You spend less time decoding size labels and more time noticing what suits the style story you want to create.
Common Questions and Mistakes to Avoid
You only need a few off numbers to get a distorted style picture. A waist reading taken too low can make a fitted dress seem less defined than it will look. A hip measurement taken over a sweatshirt can make straight-leg trousers seem wider and heavier than they will feel in real life.
That is why this part matters. Good measurements do more than help with size choice. They give you a cleaner sketch of your proportions, so the style preview you build later is easier to trust.
Quick fixes for common mistakes
-
Bulky layers on
Measure over close-fitting clothing or light layers. Thick knits and loose fabric blur your real outline. -
Tape pulled too tight
Let the tape rest on the body. If it presses in, the result describes compression, not your shape. -
Tape not level
Use a mirror for bust, waist, hip, and thigh measurements. Even a slight tilt can shift the number enough to confuse how a silhouette will read. -
Wrong waist location
Use your natural waist, not the place where your jeans or trousers usually sit. -
Changing your posture each time
Stand in a relaxed, normal way for every session. Consistency matters more than trying to stand extra tall.
Small measuring errors create bigger style confusion than many shoppers expect, because proportion is what your eye reads first.
Questions people usually have
How often should I retake my measurements
Retake them when your body changes, when your usual clothes start fitting differently, or when you want to reassess your style direction. If you use the same method each time, your notes stay useful and easy to compare.
What if I fall between two sizes on a chart
Treat that as a clue, not a dead end. Brand charts vary, and many garments are designed with very different shapes in mind. Your measurements help narrow the field, then the question becomes which cut gives you the look you want: close, relaxed, sharp, draped, long, cropped, or structured.
Can I use this for secondhand shopping
Yes, and it is often where measurement habits help the most. Resale listings may have limited photos, older size labels, or no model image at all. A clear set of measurements helps you judge whether a piece will create the silhouette you want before you commit.
Do I need lots of measurements every time
No. Keep your core measurements nearby, then add extra ones only when the garment calls for them. Sleeve, rise, inseam, shoulder width, and torso length matter more for custom-fit or shape-specific pieces than for every casual item.
What should I save after I finish
Keep one simple note with your current measurements, the date, and any fit observations you have learned about yourself. Then save a few previews or product images that match the style direction you like. Over time, that collection starts working like a visual map of what suits your eye.
What do I do with my measurements now
Use them to test style ideas instead of letting them sit in your notes app. TryThisFit lets you turn those numbers into a clearer visual starting point, so you can compare cuts, lengths, and overall vibe before you buy. If you are ready for the fun part, head to TryThisFit to preview outfit styles, test looks from shopping listings, and review saved results in your history.
Try Virtual Try-On Now
See how clothes look on you before you buy - works with any online store
Get Started Free