How to Change Dress Color in Photoshop Your 2026 Guide

You've found it. The perfect dress. The cut is flawless, the style is exactly what you've been searching for… but it's the wrong color. I've been there so many times! Knowing how to change a dress color in Photoshop is an amazing skill for this exact moment. The fastest pro-level methods use a Hue/Saturation or Solid Color Fill adjustment layer, which lets you change colors while keeping all the beautiful fabric texture and lighting intact.
Visualize Any Color Without Being a Photoshop Pro
I absolutely live for that thrill of finding a fantastic dress online. But let's be honest, that excitement can fizzle out fast when it’s not in the color you were dreaming of. In this guide, I’m going to walk you through the techniques the pros use to change dress colors in Photoshop. It's perfect for fashion lovers, online shoppers, and e-commerce sellers who need realistic results.
But let's get real for a second. Firing up Photoshop isn't always practical when you’re just trying to make a quick style decision while browsing Zara or scrolling through second-hand gems on Vinted. The process, while incredibly powerful, definitely takes time and practice to master.
A Faster Way to See How It Looks
This is exactly why I want to show you a much faster, way easier alternative I created: the TryThisFit app. Instead of spending several minutes meticulously editing a single photo, you can see how different colored clothes look on you in seconds. My goal is to give you both the robust Photoshop methods for detailed, polished work and a lightning-fast tool for those everyday "what if" style moments.
Before you jump into any complex edits, a color palette generator can be an awesome starting point. It helps you explore and visualize potential color combinations, taking the guesswork out of finding that perfect shade before you even start editing.
This quick decision tree I put together really helps clarify when to reach for powerful editing software versus a speedy AI app.
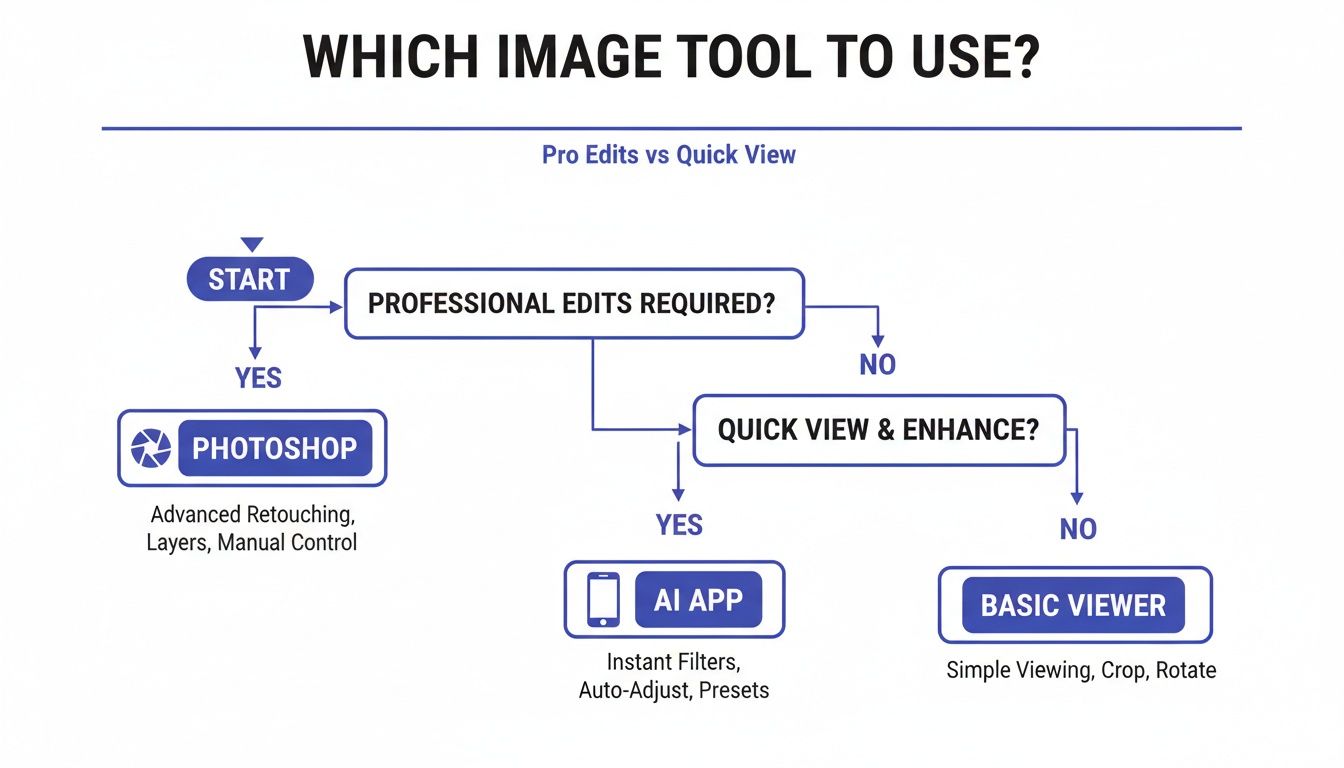
As you can see, the flowchart makes it simple: Photoshop is your go-to for detailed, professional-grade edits. An AI app, on the other hand, is built for speed, giving you a quick preview to help you visualize a style on the fly.
Photoshop vs AI Virtual Try-On: A Quick Comparison
Knowing which tool is right for the job is everything. Sometimes you need the pixel-perfect precision of Photoshop, and other times you just need the instant gratification of an AI virtual try-on. This little breakdown should help you decide.
| Attribute | Photoshop Methods | TryThisFit AI App |
|---|---|---|
| Time Investment | 5-20 minutes per item | Seconds per item |
| Skill Level | Intermediate to Advanced | Beginner (no skills needed) |
| Primary Use | High-quality product mockups | Quick style visualization |
| Convenience | Requires desktop software and manual work | Instant, on any retail website |
| Best For | Perfecting a single, important image | Comparing many items and colors quickly |
By the way, if you want to get the best possible results from any try-on app, check out my guide on how to take a great full-body picture.
Ultimately, both of these tools are here to help you make smarter, more confident fashion choices. Photoshop gives you ultimate control for those polished, final images. In contrast, an app like TryThisFit is your secret weapon for rapid-fire decisions, letting you see how dozens of styles look in minutes while browsing your favorite stores. All your try-ons are automatically saved in your personal /history so you can review them later.
Ready to see for yourself? Try it now at trythisfit.com.
Alright, let's talk about my absolute favorite way to change a dress color in a flash: the Hue/Saturation Adjustment Layer in Photoshop. If you need a quick and effective color swap, this is the tool you'll want to master. It’s the classic method for a reason—it’s fast, totally non-destructive, and gives you incredible control without a steep learning curve. I use it constantly for whipping up quick mockups or just exploring different style options.
Before we do anything else, we need a clean selection. Honestly, you can't get a good color change without a good selection. My secret weapon for this is Photoshop's Object Selection Tool. It's brilliant. You just draw a loose box around the dress, and the AI snaps a selection right to the edges. It’s not always flawless, but it gets you 90% of the way there in a single click.
Creating the Adjustment Layer
With your selection active (you'll see those "marching ants"), head down to the Layers panel and find the little half-black, half-white circle icon. Give that a click and choose Hue/Saturation from the menu. Boom! Photoshop instantly creates a new adjustment layer with a layer mask built from your selection. Now, any changes you make will only hit the dress.
This is what I call a non-destructive workflow, and it's the only way pros work. Your original photo is always safe and untouched. You can go back and tweak your color, disable the effect, or just delete the layer entirely. It gives you complete freedom to experiment.
Inside the Hue/Saturation panel, you'll find three main sliders:
- Hue: This is the fun one—it changes the actual color! Sliding it left or right cycles the colors in the dress through the entire color spectrum. That red dress can become purple, blue, green, and anything in between.
- Saturation: This slider controls the color's intensity. Push it right for a more vibrant, eye-popping color, or slide it left to mute the tones for a more subtle look. All the way left turns it grayscale.
- Lightness: A word of caution on this one. While it adjusts brightness, pushing it too far can completely blow out the fabric details and make it look flat and fake. I almost never touch it, preferring other methods to adjust brightness.
My Pro Tip for Super Realistic Colors
Here’s a little trick I've picked up over years of doing this: when you land on a new color, it often looks just a little too perfect, a bit artificial. To sell the effect and make it look totally believable, you need to dial back the saturation just a touch.
Pull that Saturation slider to the left, maybe to -5 or -10. It’s a subtle move, but it helps the new color settle into the photo’s original lighting and shadows, making it look much more natural.
Key Takeaway: The goal isn't just to swap a color; it's to make it look like the dress was always that color. You absolutely must preserve the fabric's original texture, highlights, and shadows. A tiny bit of desaturation is often the secret ingredient for realism.
This whole technique is incredibly powerful, but it’s not instant. Even for a quick Hue/Saturation edit, I've seen user benchmarks on forums suggest it takes a good 5-10 minutes per image. That's probably too slow if you're just trying to decide between a red or blue dress you spotted on an Amazon product page.
This brings up a fascinating point. Have you ever wondered why we even need to do this? In 2023, e-commerce fashion sales soared to an unbelievable $759 billion globally. Yet, the return rate for online clothing from major retailers like Amazon, H&M, and Zara is still a staggering 25-35%! A huge chunk of those returns are because the color or style just wasn't what the customer expected. Photo editing and virtual try-ons are direct answers to this massive problem. If you're a numbers nerd like me, you'll love this video digging into e-commerce trends.
Refining Your Selection with the Layer Mask
Let's be real, that initial AI selection is rarely perfect. You might see some color spilling onto the model’s skin or the background, or maybe it missed a tiny strap or fold. This is exactly what the layer mask is for! Just click on the black and white thumbnail on your Hue/Saturation layer to start refining.
Now, grab the Brush Tool (B). Using a soft-edged brush, paint with black to hide the color effect wherever it’s spilling over. If you paint away too much, no sweat! Just switch your brush color to white and paint the effect right back on. It’s that simple: black conceals, white reveals.
My Favorite Method: Using a Solid Color Fill Layer
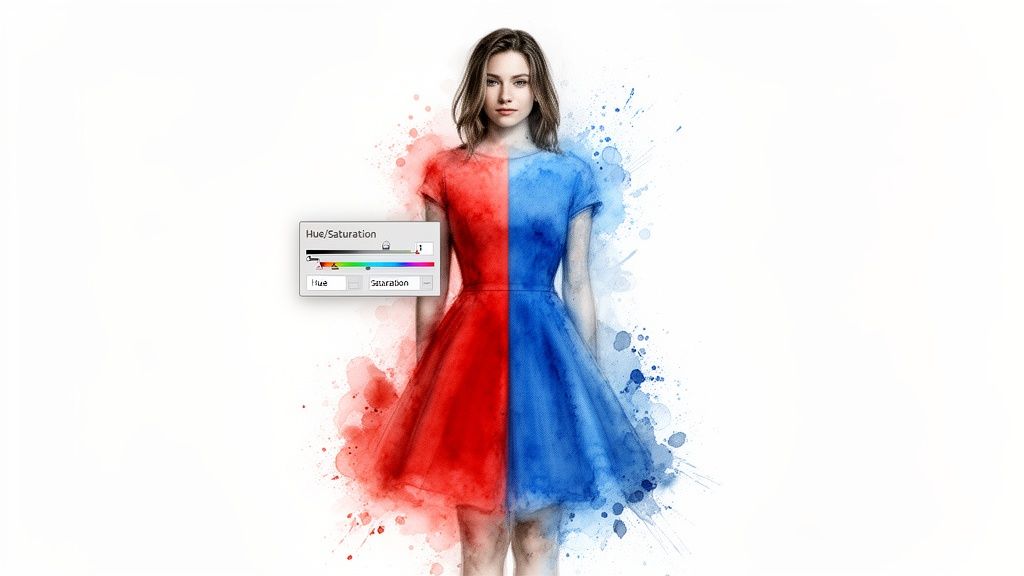
When you need dead-on color accuracy, the Solid Color Fill layer is the technique you want to reach for. This is my personal go-to when a project demands perfection—think matching a specific Pantone color for an e-commerce product shot or seeing exactly how a DIY dye job will turn out on that dress you found on Vinted.
Instead of just nudging existing colors around, this method lets you "paint" a brand new, solid color right on top and then blend it in seamlessly. It might sound a bit technical, but trust me, it's surprisingly easy and gives you some of the most realistic results you can get in Photoshop.
Applying the Solid Color
First, you need to isolate the dress. Grab the Object Selection Tool for a quick start or use the Pen Tool if you need super clean lines. With your selection active (you'll see the "marching ants"), head up to Layer > New Fill Layer > Solid Color. A new layer will pop up, covering your selected dress area with whatever color you pick.
At this point, it’s going to look like a flat, cartoony mess. Don't panic! This is where the real magic happens: Blending Modes.
Select your new Solid Color Fill layer, look for the dropdown menu in the Layers panel (it probably says "Normal"), and change it to Color. Instantly, the texture and lighting of the original dress reappear.
Why This Works: The Color blend mode is a total game-changer. It takes the hue and saturation from your new color layer but leaves the original brightness and shadows from the dress layer underneath. This is the secret to keeping that beautiful, realistic fabric detail intact.
The Power of Blending Modes
While Color is the hero for most jobs, it’s not your only option. Knowing when to use the others is what separates the pros from the beginners when you need to change dress color in Photoshop.
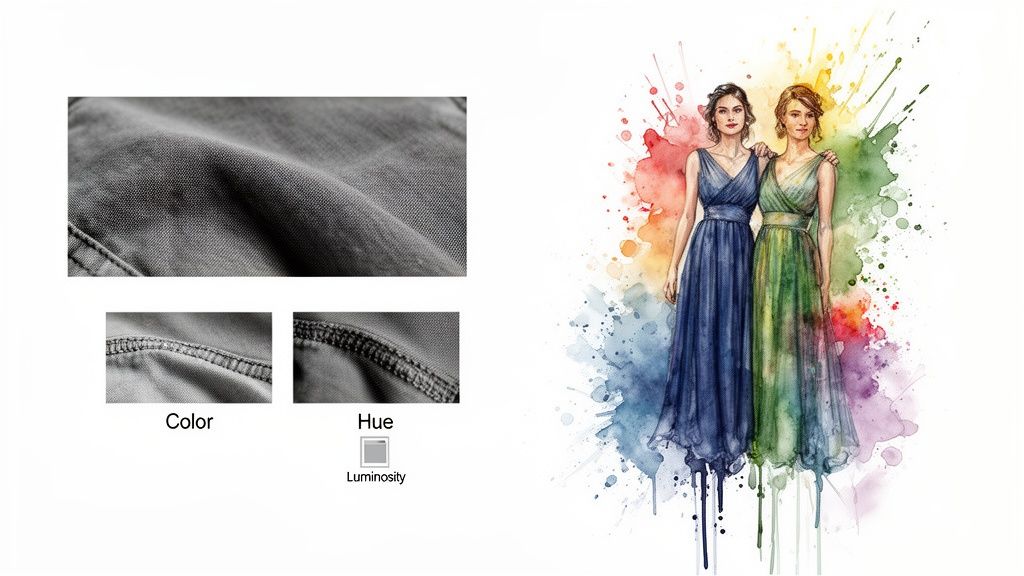
- Color Mode: Your workhorse. It blends the new color's hue and saturation with the original fabric's light and shadow. Perfect for 90% of your color change projects.
- Hue Mode: This one only changes the color itself (the hue), leaving the original saturation and brightness alone. It’s a great choice if the original fabric has a unique saturation you want to preserve.
- Multiply Mode: This mode is fantastic for adding rich color to white or very light-colored clothing. It essentially multiplies the colors, resulting in a deeper, more dramatic look.
It’s amazing how far these tools have come. Back in the '90s, this kind of edit involved convoluted CMYK channel swapping. Today, even with all the new AI features, the Solid Color Fill layer remains a favorite because it's so effective—most tutorials show it can be done in just 4 minutes. And getting color right is more important than ever. In 2024, Pitney Bowes reported that global e-commerce returns hit a staggering $1.1 trillion, with 24% of those returns due to apparel looking different from the picture. That’s a massive issue for retailers from Amazon all the way to Shein.
Fine-Tuning for a Flawless Finish
Ready for one last trick to make it look absolutely perfect?
I duplicate the Solid Color Fill layer (Cmd/Ctrl + J). Then, I change the new, duplicated layer’s blend mode to Luminosity and drop its opacity way down to 10-20%. This little step lets me subtly tweak the brightness of the new color without messing with its hue, helping it sit naturally in the photo's lighting.
You can also use a clipped Curves adjustment layer for this. By adding a gentle "S" curve, you can boost the highlights and deepen the shadows, adding a final pop of realism. If you want a deep dive on this, check out this guide on how to change the color of a fill layer in Photoshop.
Of course, the best editing technique won't help if you pick the wrong color! If you're looking for inspiration on what shades work best for you, my guide on finding the best colors for your skin tone is the perfect place to start.
Ready to Conquer Tricky Patterns and Textures?
Changing the color of a simple, solid dress is one thing. But what happens when you’re staring down an intricate floral pattern, delicate lace, or a fuzzy knit sweater? This is honestly where most people get tripped up in Photoshop, but it's also where you can work some serious magic and create edits that look absolutely real. Let's dive into the tools that will make you a pro at handling even the most complex fabrics.
I'll kick things off with the Color Replacement Tool. Now, I almost always push for non-destructive methods, but I have to admit, this tool can be a lifesaver for quick-and-dirty edits on simple patterns. You just have to be smart about how you use it.
A Quick Fix: The Color Replacement Tool
You’ll find the Color Replacement Tool hiding under the main Brush Tool in your toolbar. The absolute most important rule here is to never use it on your original image. Always duplicate your layer first (Cmd/Ctrl + J) to keep your original safe. Once you've got your copy, select the tool and pick the new color you're aiming for.
The real power is in the settings bar at the top:
- Mode: Keep this set to Color. This is the secret sauce that makes sure you're only changing the hue and saturation while leaving all that beautiful fabric texture untouched.
- Sampling: I always, always use Once. This tells Photoshop to stick to replacing only the very first color you click on.
- Limits: Find Edges is usually your best bet. It does a decent job of keeping the color from bleeding outside the lines of a pattern.
- Tolerance: This is where you'll do most of your tinkering. A low Tolerance (think 20-30%) is perfect for patterns with clean, distinct colors. If the colors are more blended, you'll need to bump it up.
From there, just click and paint over the color you want to swap out. It’s not always flawless, but for getting a quick preview, it’s fantastic.
The Real Magic: Selective Color
Okay, now for the main event. When you need absolutely perfect, professional-grade results on a complex, multi-colored dress, the Selective Color adjustment layer is your best friend. Period. This tool gives you surgical control, letting you do things like change just the red flowers in a print to blue, without touching the green leaves or white background.
This is how you truly master changing dress colors in Photoshop.
Simply add a new Selective Color adjustment layer. In the properties panel, you'll see a Colors dropdown menu. This is your command center. You can target specific color families—Reds, Yellows, Greens, Cyans, Blues, and Magentas—as well as the overall Whites, Neutrals, and Blacks.
My Go-To Technique: Let's say you want to change red flowers. Choose "Reds" from the dropdown. Now, you can use the Cyan, Magenta, Yellow, and Black sliders to subtly remix the color only within those red areas. Nudging the Cyan slider to the right will add blue tones to the reds, pushing them toward purple or even a cool blue.
This technique gives you the incredible precision needed for high-end e-commerce photos or detailed style mockups. It’s what separates a clumsy edit from one that’s completely believable.
Perfecting Your Edges with Select and Mask
No masterpiece is complete without clean edges, especially when you're dealing with tricky materials like lace, sheer fabric, or fuzzy sweaters. After you've made your initial selection of the dress, find and click the Select and Mask button. This will transport you into a dedicated workspace built for one thing: perfecting your selection.
The most powerful weapon in your arsenal here is the Refine Edge Brush. Use it to paint right along those difficult edges—think flyaway hairs against the dress or the soft, fuzzy halo of a wool coat. Photoshop works its magic, analyzing the pixels and intelligently separating your subject from the background.
It definitely takes some practice to get a feel for it, but mastering the Select and Mask workspace is a non-negotiable skill for creating truly high-quality edits that will fool any eye.
The Instant Alternative: See Any Color on You in Seconds
Let's be real. Mastering Photoshop is a fantastic skill for polished, professional projects. But who has the time to fire it up every time you spot a cute top on Shein or a vintage jacket on Depop? For the fast-paced world of online shopping, you need something that works in a click, not a project.
That's exactly why I built the TryThisFit app. It's my personal solution to skip the manual editing altogether. There’s no complex skills to learn and definitely no fuss. It’s all about pure, instant style visualization.

Skip the Software and See the Style Instantly
Getting started couldn't be easier. All it takes is a free Chrome extension that installs in a couple of seconds. Once you’ve added it to your browser, you're ready to go.
Now, whenever you’re browsing your favorite clothing stores—whether it's Zara, H&M, or even massive marketplaces like Amazon—you can virtually preview the appearance of clothes right from the product page. Just find a clothing photo, right-click, and let the extension work its magic. It instantly shows you how that piece looks on your own photo, helping you decide if it's "the one."
A quick tip from my own experience: flat-lay clothing photos work best. These are the shots where the garment is laid out flat, which gives the AI a super clear view of its shape and details for the most accurate results.
Why This Beats Photoshop for Shopping
The real magic here is the speed. Imagine a product page with five different color options. The Photoshop route would mean downloading each image and spending minutes editing every single one. With the extension? You just right-click one color after another and see them on yourself in seconds.
This instant feedback is a game-changer for discovering your personal style and making shopping decisions you won't regret. It helps you finally answer that crucial question: "But would I actually wear this?"
Color uncertainty is a massive hurdle in e-commerce. A 2022 Adobe study revealed that 78% of online shoppers abandon their carts because of color doubts. This doubt fuels a staggering $550 billion in annual returns, with fast-fashion giants like Zara and H&M seeing return rates as high as 28%.
While a Photoshop tutorial teaches you the craft, the software itself costs you time and money. That’s the gap I wanted to fill with TryThisFit. The app uses AI to give you a virtual try-on, all through a simple, free extension. To see just how much this issue impacts the industry, you can discover more insights about e-commerce trends.
From Online Shopping to Halloween Costumes
Honestly, the possibilities are endless. This isn't just for checking out the latest drops on ASOS. I use it all the time for things like:
- Secondhand Shopping: On platforms like Depop and Vinted, sales are often final. Being able to visualize a unique, one-of-a-kind piece on yourself before you buy is a total lifesaver.
- Planning Outfits: Got an event on the calendar? You can quickly audition different dresses and see how they suit the occasion without ever leaving your browser. My guide to trying on dresses virtually is packed with more ideas.
- Trying Halloween Costumes: Wondering if that wild costume will actually look good on you? Now you can see for yourself before you commit.
You can start trying things on right away—no account needed. It even saves your try-on history for you to look back on later. It’s all about saving you time, helping you dodge returns, and making fashion fun again.
Ready to transform your online shopping? Install the free Chrome extension in 5 seconds and see the difference.
Your Questions Answered
Alright, let's dive into some of the most common questions that pop up when you're trying to change a dress color in Photoshop. Getting these little details right is what separates a good edit from a great one, and I'll share some quick fixes I've picked up over the years to help you nail those realistic results.
How Do I Make the New Color Look Realistic and Not Flat?
This is the million-dollar question! The real secret lies in preserving the original fabric's highlights, shadows, and texture. Once you've applied your new color with a Solid Color Fill layer, don't stop there.
Pop a new Curves adjustment layer on top and clip it directly to your color layer. Now, gently create a subtle 'S' curve. This little move is pure magic—it brings back all that gorgeous, natural depth by punching up the highlights and deepening the shadows.
It's also super tempting to crank up the saturation, but new colors almost always look more authentic when they're a bit more muted. Try pulling the saturation down just a touch. For the final chef's kiss, add a tiny bit of noise (Filter > Noise > Add Noise). A value of 1-2% is usually all you need to perfectly mimic the original photo's grain and make the new color look like it was there all along.
What Is the Best Way to Select a Dress on a Busy Background?
When the background is a total mess, Photoshop's AI tools are your absolute best friend. Seriously, they do most of the heavy lifting for you.
Start with the Object Selection Tool. Just draw a loose box around the dress and watch it work its magic. From there, you'll want to refine the edges. Jump into the Select and Mask workspace and grab the Refine Edge Brush Tool. Gently paint along tricky areas like stray hairs or fuzzy fabric to get a flawless, professional-looking selection.
If you're dealing with clean, hard lines and need absolute perfection, nothing beats the Pen Tool. It takes a bit more patience to trace the outline, but the crisp, clean selection you get is 100% worth the effort for a high-end edit.
Can TryThisFit Change the Color of Any Dress I Find Online?
The TryThisFit app is an incredible shortcut for visualizing different styles and colors on yourself without ever opening Photoshop. While it doesn't have a "change color" button in the traditional sense, it lets you see different colorways in a flash.
Here's how it works: many retailers, like Zara or Amazon, list the same dress in multiple colors. With the free Chrome extension that installs in a couple of seconds, you can just right-click on each color option online and instantly see them all on your own photo, one after another. It's so much faster than editing each one!
The app works best with flat-lay photos of clothing. This gives the AI a clear, unobstructed view of the item’s shape, which means you get a much more accurate preview of the style.
Remember, the app is all about visualizing how a style and color look on you—it's perfect for deciding if a cut or shade is flattering. Think of it as your virtual try-on for appearance, not for a specific measurement-based fit.
How Do I Fix Color Spilling onto the Background?
Ah, the dreaded color spill! It happens to everyone, but thankfully, it’s a super simple fix using your layer mask.
Just select the mask on your adjustment layer (it's that black-and-white thumbnail next to the layer icon). Grab a soft-edged Brush Tool.
Now, here’s the key: paint with black to hide the color spill on the background. If you accidentally erase part of the dress, just switch your brush color to white to bring it back. Zooming in close is your best bet for getting this just right. On a layer mask, always remember: black conceals the effect, and white reveals it.
Ready to spend less time editing and more time visualizing? With TryThisFit, you can see how hundreds of different styles and colors look on you in seconds. Ditch the guesswork and start making confident shopping decisions. Try it now at trythisfit.com
Try Virtual Try-On Now
See how clothes look on you before you buy - works with any online store
Get Started Free