A Guide to Clothes Product Photography That Sells
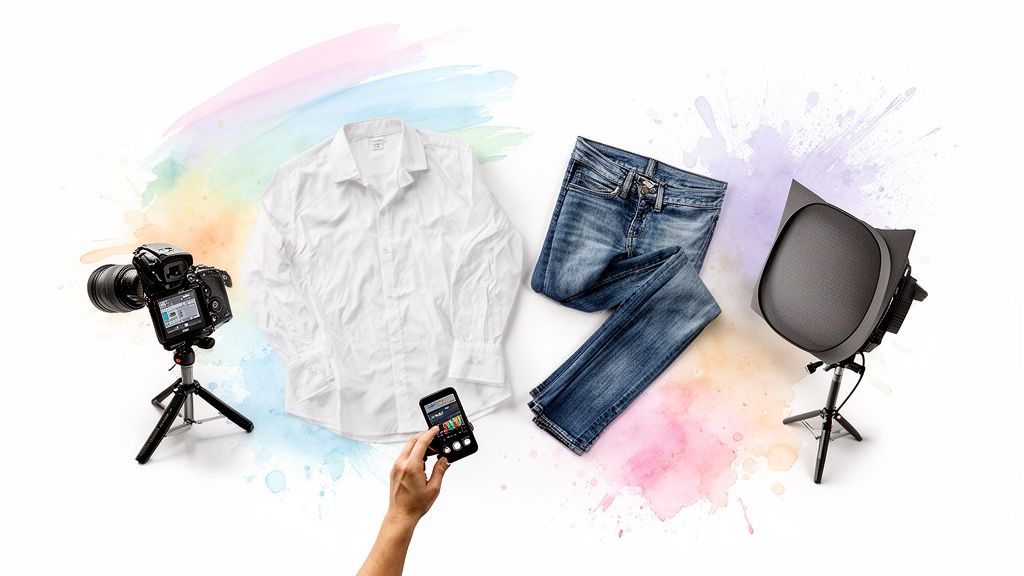
Let's be honest, your product photos are your most powerful sales tool. They're the digital handshake, the virtual mannequin, and the 24/7 storefront that convinces a shopper to hit "add to cart" without ever touching the fabric.
Since buyers can’t feel the material or preview the appearance in person, your images have to do all the heavy lifting. They need to tell a compelling story of quality and style.
Why Amazing Product Photos Are Your Best Salesperson
In the world of online fashion, your photos are everything. They are the single most important bridge between a casual browser and a loyal customer.
Stunning visuals don't just display a product; they build trust, scream brand value, and create an emotional spark that turns a simple garment into a must-have item.
This isn't just a hunch I have—the data backs it up completely. A staggering 90% of online shoppers say photo quality is the most crucial factor when making a purchase. Professional images don't just look pretty; they directly impact your bottom line and can seriously cut down on returns.
The Power of a Perfect First Impression
A great photo stops the scroll. Simple as that. It grabs a shopper's attention and instantly gets them picturing themselves wearing your clothes.
This is your chance to shine and stand out from the crowd, whether you're selling on Amazon, Vinted, or your own boutique website.
High-quality, consistent photography is the language of trust in e-commerce. It signals to the buyer that you are a professional, credible seller who cares about quality, which in turn makes them more confident in their purchase.
Think of this guide as your personal launchpad. I’m going to walk you through exactly how to create captivating visuals that not only look fantastic but also work hard for your brand.
By the time we're done, you'll have the skills to produce photos that drive sales and slash those frustrating returns. To really dig into this, you should check out my guide on how to improve e-commerce conversion rates.
Optimizing for the Future of Shopping
Beyond just looking good, certain photography styles are becoming non-negotiable for modern shopping tools. Take flat-lay clothing photos, for instance. I recommend them all the time because they work beautifully with virtual try-on technology.
A clean, perfectly shot, top-down image gives an app like TryThisFit the perfect canvas to let users instantly visualize your styles on themselves. It's a fun, fast way for them to connect with your products, and it all starts with the photo you take.
Building Your Photography Toolkit on a Budget
Ready to start shooting? Let's get one thing straight: you don't need to spend a fortune to get photos that sell. I'm going to walk you through building a seriously effective and affordable kit for your clothes.
This setup will deliver incredible results without making your wallet cry. The first thing everyone asks about is the camera. And yes, while a fancy DSLR is great, the camera you already have in your pocket is an absolute powerhouse.
Modern smartphones are more than capable of capturing crisp, vibrant images that will look fantastic in your online store. The real secret isn't the price tag of your gear; it's knowing how to use what you've got.
Smartphone vs DSLR: The Real Deal
Don't fall into the trap of thinking you need a professional camera to start. Seriously, I've seen jaw-dropping product shots taken on a phone!
The beauty of a smartphone is its sheer convenience and the smart software that automatically handles tricky lighting for you. A DSLR offers more manual control, which is great, but it also comes with a much steeper learning curve.
My advice? Start with the camera you already own. Spend time mastering your smartphone's features—like using gridlines for composition and locking the exposure—before you even think about upgrading. You will be blown away by the quality you can get.
No matter which camera you use, a tripod is your new best friend. It's non-negotiable. It completely eliminates camera shake, guaranteeing your photos are consistently sharp and perfectly aligned. This is an absolute game-changer for creating a cohesive look across all your product listings.
Lighting and Essential Accessories
Lighting is where the magic really happens. The best part? You can start for free. Find a large window and use that beautiful, soft, natural light—it's incredibly flattering for fabrics and costs absolutely nothing!
If your space is a bit on the dark side, a simple ring light or a single softbox lighting kit is a fantastic, budget-friendly investment. It gives you complete control over the look and feel of your shots, day or night.
A few super cheap accessories can take your photos from "good" to "wow":
- White Foam Boards: Grab a couple from a craft store. Use them to bounce light back onto your garment, filling in any pesky shadows for a bright, clean, and even look.
- Clean Backdrops: You don't need anything fancy. A big roll of white paper, a freshly painted wall, or even a simple, neutral-colored piece of fabric creates a professional, distraction-free background.
- Tape and Clamps: These are your secret styling weapons! A little bit of tape can tame a stubborn wrinkle, and a well-placed clamp can help you create the perfect, flattering drape on a piece of clothing.
Let's break down what's truly necessary versus what's nice to have as you build your kit.
Essential vs. Optional Photography Gear
This table cuts through the noise and shows you exactly where to focus your budget when you're just starting out.
| Gear Type | Essential (Must-Have) | Optional (Nice-to-Have) |
|---|---|---|
| Camera | Your smartphone | A DSLR or mirrorless camera |
| Stability | A sturdy tripod | A remote shutter release |
| Lighting | Natural light from a window | A ring light or softbox kit |
| Background | A clean wall or white paper roll | Professional vinyl or fabric backdrops |
| Light Modifiers | White foam boards for bouncing light | Reflectors, diffusers, external flash |
| Styling Tools | Tape, clamps, and pins | A handheld garment steamer |
Focus on mastering the essentials first. You can always add the optional gear later on as your business grows and your needs evolve.
For those who really want to stretch a tight budget, there are tons of great affordable product photography tips out there to help you achieve professional results. By combining these simple tools, you can create a versatile home studio setup that rivals the pros.
Mastering Flat Lays for E-Commerce and Virtual Try-Ons
Let's talk about one of my favorite techniques in the clothing photography world: the flat lay. It's clean, it’s modern, and honestly, it’s a total game-changer for any online clothing store.
But the real reason I’m such a huge advocate for it? It’s the absolute best way to prep your images for virtual try-on tools. A great flat-lay gives you a pure, undistorted view of the garment—exactly what an AI needs to work its magic.
Preparing the Garment
First things first, let's get the basics right. Your clothing has to be absolutely pristine. A wrinkle-free, clean item is the non-negotiable starting point for professional-looking shots.
I really can't say this enough: spend a few extra minutes with a steamer or iron before you even think about picking up your camera.
Every single wrinkle, loose thread, or speck of dust will jump out in a high-resolution photo. Taking time to prep the garment is the single easiest thing you can do to elevate your images from looking amateurish to truly professional.
Once it's perfectly steamed, lay the item on a clean, non-distracting background. A simple white or light-gray backdrop is my go-to because it lets the clothing be the undeniable star of the show.
Composing the Perfect Shot
Now for the fun part—arranging the garment is a bit of an art form. You want it to look natural and appealing, almost like it has a little life of its own.
Gently shape the sleeves, smooth out the torso, and make sure the silhouette is super clear and easy to read. This quick process flow breaks down the basic, budget-friendly kit you’ll need to capture these fantastic shots.
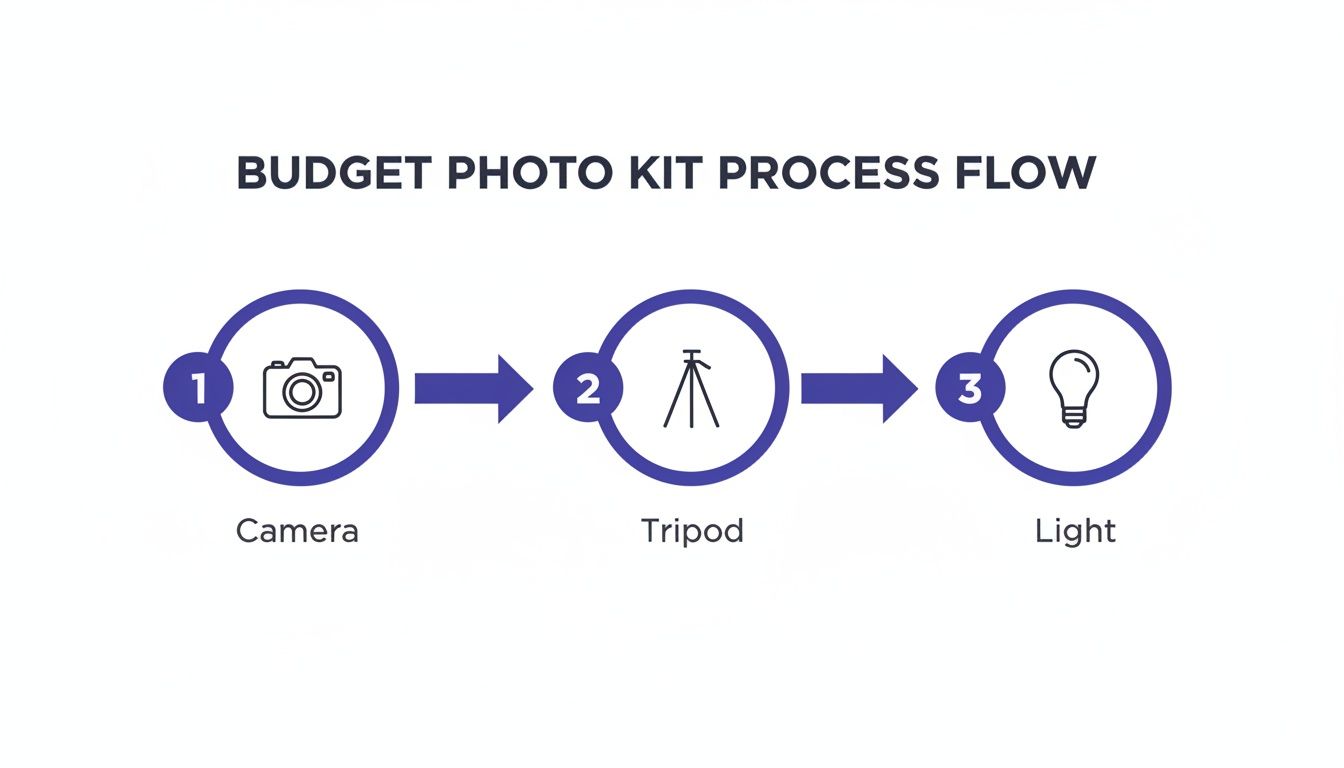
Seriously, that's it. This simple setup—a camera, a tripod for stability, and a decent light source—is all it takes to start producing seriously high-quality images.
The most critical rule for flat lays is to shoot from directly overhead. This angle is everything. It prevents distortion and captures the garment’s true shape, which is vital for both your customers and for any virtual try-on apps. If you really want to get into the nitty-gritty, you can find more tips in my detailed guide to mastering flat-lay clothing photography.
Why Flat Lays Are a Virtual Try-On Superpower
So, why am I so jazzed about this specific style? It's simple. A clean flat-lay gives an app like TryThisFit an amazing, unobstructed canvas to show you how a style will look on your body.
Because the photo is so clear and direct, the AI can seamlessly map the clothing right onto your photo for an instant preview.
Picture this: you're browsing H&M or Zara and spot a cool jacket. With the free TryThisFit Chrome extension, which installs in a couple of seconds, you can just right-click that photo and instantly see how it looks.
No accounts, no signing up—just a quick, fun way to visualize your style on any site. This totally changes the shopping experience, helping you explore new looks with confidence, which means saving time and avoiding the disappointment of returns.
Your Guide to Perfect Lighting and Camera Settings
Let's talk about the absolute secret sauce of clothing photography: lighting. It's the one thing that can single-handedly transform a simple snapshot into a stunning, professional-grade image that makes people want to buy.
I want to demystify it so you can take creative control and capture consistently brilliant photos, every single time.
<iframe width="100%" style="aspect-ratio: 16 / 9;" src="https://www.youtube.com/embed/G6W5wbPqzPw" frameborder="0" allow="autoplay; encrypted-media" allowfullscreen></iframe>You know what the best lighting tool is? It's completely free, and it’s probably right next to you: a window! Natural light is your best friend in this business. It’s soft, incredibly flattering, and shows off colors beautifully and accurately.
Set up your garment near a large window, but make sure it’s out of that harsh, direct sunlight. If the sun is beaming in a little too strong, just hang a thin white sheet over the window. This simple trick diffuses the light, creating a gorgeous, soft glow.
Harnessing Natural and Artificial Light
Ever wonder why so many online stores look a certain way? There's a method to the madness. It's no accident that 47% of clothing brands shoot on clean white studio backgrounds, and another 47% point to natural lighting as the key to boosting sales.
This isn't just a trend; it's a proven strategy for making clothes look irresistible. If you want to geek out on this stuff, you can explore more insights on fashion photography trends.
But what if natural light isn't an option? A simple, one-light setup with an affordable softbox or even a ring light can work wonders. Just place your light at about a 45-degree angle to the product to create soft, dimensional shadows that bring out the fabric's texture.
My Pro Tip: No matter your light source, grab a cheap white foam board and place it on the opposite side of your garment. It will bounce light back into the shadows, brightening up the whole product for a clean, evenly lit look. It’s a game-changer.
Demystifying Camera Settings
Okay, let's get into camera settings without making your head spin. Whether you're using a fancy DSLR or your trusty smartphone, a few small tweaks can make a massive difference.
- Aperture (or Portrait Mode): For product shots, you want everything looking sharp. On a DSLR, use a higher f-stop number, something like f/8 or f/11. If you're on a smartphone, avoid portrait mode.
- ISO: Always keep your ISO as low as you can—think 100 or 200. A low ISO is what keeps your images crisp and clean, preventing that grainy, noisy look.
- Shutter Speed: Since you’re using a tripod, you don't need a crazy-fast shutter speed. A setting around 1/125 is a fantastic starting point to get a sharp, perfectly exposed image.

Essential Smartphone Photography Tips
Shooting with your phone? Awesome! You can get absolutely incredible results with the camera in your pocket. First thing's first: turn on your camera's gridlines. This simple tool is a lifesaver for composition.
Next, tap and hold on your screen to lock the focus and exposure. This stops the camera from constantly readjusting the brightness, which means your photos will have consistent lighting. For more tips on getting that perfect shot, check out my guide on taking a great full-body picture.
And my final, most important tip: never, ever use the digital zoom. It will absolutely destroy your image quality. If you need to get closer, just move your phone closer. Once you master these simple settings, you're well on your way to creating photos that truly sell.
Polishing Your Photos: The Magic Happens in the Edit
Alright, you’ve wrapped up the shoot and have a camera roll full of great shots. Now for the fun part! This is where we take those good photos and turn them into stunning, "I-need-this-now" images.
Post-processing is your secret weapon for creating a polished, cohesive look that builds trust and gets customers excited.
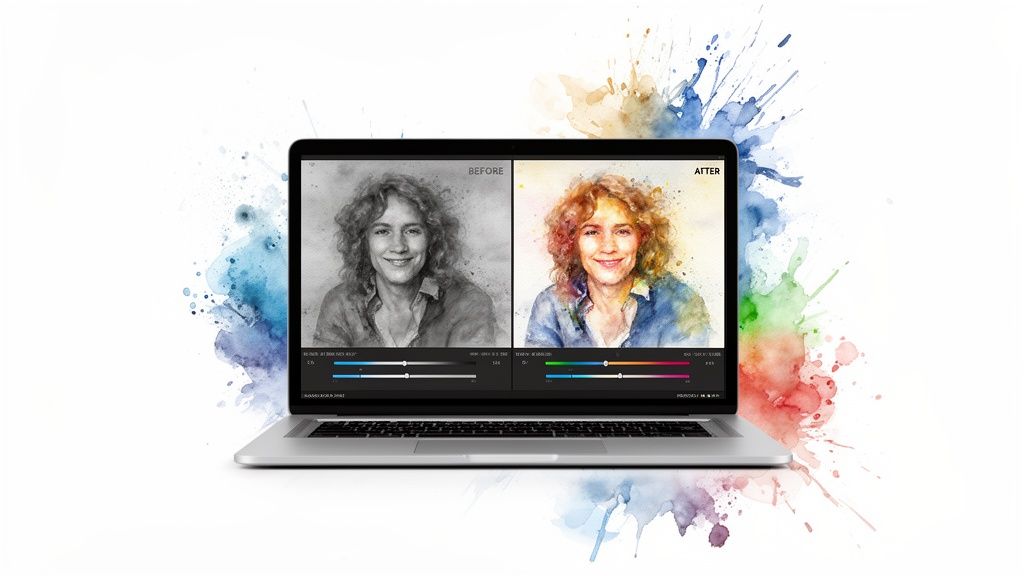
Before you do anything else, start with the basics: crop and straighten. It sounds simple, but ensuring your garment is perfectly centered with straight lines is a small tweak that has a massive impact. It instantly makes the photo feel more deliberate and professional.
Getting the Colors and Brightness Just Right
Color is everything in fashion e-commerce. Your number one tool in your arsenal here is white balance. Your mission is to make sure the white background is a true, pure white—not tinged with yellow or blue.
Get this right, and every other color in the garment will fall into place, looking rich, vibrant, and true-to-life. Once the white balance is set, I’ll play with brightness and contrast to make the fabric's texture pop.
My go-to trick for adding a professional touch? A gentle S-curve in the tone curve settings. It subtly deepens the shadows and lifts the highlights, giving the image a beautiful, dynamic punch without looking over-edited.
These little adjustments are what really elevate a simple product shot into compelling, professional photography.
My Favorite Editing Tools
You don't need a huge budget to get pro results. There are fantastic editing tools out there for everyone.
- On Your Phone: For editing on the fly, you can't beat Snapseed or Adobe Lightroom Mobile. They are incredibly powerful, free, and give you granular control right from your phone.
- On Desktop (Free): GIMP is the classic free alternative to Photoshop, packed with advanced features. I'm also a big fan of Photopea, a browser-based editor that’s shockingly capable and requires zero installation.
- On Desktop (Paid): Adobe Lightroom is the industry standard for a reason. Its ability to organize thousands of photos and apply consistent edits across an entire collection is an absolute game-changer.
Exporting for a Fast, Beautiful Website
You’ve done the work, and your photos look incredible. The last step is to export them properly. You're aiming for crystal-clear images that load in a flash.
My rule of thumb is to save them as JPEG files at a quality setting between 70-80%. This strikes the perfect balance between high quality and a small file size that won't slow down your website.
It's also crucial to learn how to optimize images for web to give your site the best possible performance. Imagine a shopper on Shein or Vinted, finding your item, and using the TryThisFit Chrome extension to instantly see how it looks on them. Try it now at trythisfit.com and see the magic for yourself!
Uh-Oh! Common Clothing Photography Mistakes and How to Sidestep Them
We’ve all made mistakes, but a few common slip-ups can be the difference between a sale and a lost customer. Let's walk through the pitfalls I see most often so you can get straight to creating images that build trust and sell your amazing clothes.
Mistake #1: Wildly Inconsistent Lighting
One of the biggest giveaways of an amateur shoot is inconsistent lighting. You know the look—one photo is warm and yellowy, the next is cool and blue. It's jarring for shoppers and makes your whole collection feel unprofessional.
The fix is refreshingly simple: batch your work. Shoot all the items for a single collection in one session. Use the exact same lighting setup and camera settings for every single shot to create a smooth, cohesive shopping experience.
Mistake #2: Busy Backgrounds and Wrinkled Clothes
This one’s a two-parter, but they both stem from a lack of attention to detail. First, a busy background is a product killer. Your garment is the star of the show, but a cluttered backdrop steals the spotlight.
Always stick with a clean, neutral background. And please, don't commit the cardinal sin of product photography: wrinkles! Nothing torpedoes a customer's perception of quality faster. Take five minutes to steam or iron every piece before it gets in front of the camera.
Your goal is to build trust through visuals. Every little detail, from perfect lighting to a crisp, wrinkle-free finish, signals to your customer that you’re a professional who cares about quality.
Mistake #3: Getting the Color Wrong
"The color looked different online." Yikes. Those are words that no online seller wants to hear, as they almost always lead to a return. Inaccurate color is a massive source of customer frustration.
To nail your colors, always edit your photos in a well-lit environment. The most powerful tool at your disposal is the white balance setting. Tweak it until the whites in your image are pure, brilliant white. Once you get that right, all the other colors will fall into place.
Mistake #4: Not Showing Enough Photos
You wouldn't buy a car after seeing just one picture, right? The same goes for clothes! Shoppers are hungry for details. Top-tier brands use an average of 8 images per product.
A lack of good visuals is responsible for a whopping 22% of all online returns. Don't be shy—show everything! Give them the front, the back, and a close-up of the fabric texture. You can dive deeper into why multiple images are so critical right here. The more you show, the more confidence you build.
Got Questions? I've Got Answers
I get asked a lot about the nitty-gritty of clothing photography. Let's tackle some of the most common questions that pop up so you can get back to creating those perfect shots.
Can I Really Get Great Clothing Photos With Just My Phone?
You absolutely can! I've seen phone photos that blow away shots from expensive DSLRs. It’s not about the gear; it's all about the technique.
The secret sauce is controlling your lighting, locking your phone onto a tripod for a super-steady shot, and turning on the gridlines to nail your composition. Get those three things right, and you'll be amazed at the professional-quality images you can create.
How Can I Get the Colors to Look True-to-Life?
This is a big one. Getting colors right is non-negotiable if you want to build trust and keep those return rates down. Nothing is more frustrating for a customer than receiving a green shirt that looked blue online.
Your best bet is to shoot in bright, indirect natural light. Then, use the white balance tool in your editing software on something that's supposed to be pure white in your photo. That one click often snaps all the other colors into perfect, accurate alignment.
Why Are You So Big on Flat-Lays for Virtual Try-On Apps?
I’m glad you asked! Flat-lay photography is the gold standard for virtual try-on because it gives the app a perfect, undistorted view of the garment's true shape and style.
When a piece of clothing is on a model, the pose can stretch or hide parts of the item. A flat-lay is like a blueprint. It gives an AI tool, like the one I built for TryThisFit, the clean data it needs to accurately map the clothing onto your own photo for a more realistic and helpful preview.
Ready to put all this to the test and see how those amazing photos translate to your own style? With TryThisFit, you can preview outfits from any online store in just a few seconds. Give it a go at trythisfit.com and find your next favorite look.
Try Virtual Try-On Now
See how clothes look on you before you buy - works with any online store
Get Started Free